Boot0: Error 4k Hard Drive Fix for OSx86 Hackint0sh drives
The Problem:
The Solution:
- Install as you would and acquire a bootloader.
- You need the boot1h from your specific bootloader, I can upload mine but you might use a specific revision of Chimera, Chameleon, or Enoch depending on your model, this can be found in the i386 folder if you extract the contents of the pkg file. (Hint: if you have a bootloader installed and aren’t sure what revision it is, you can find it’s boot1h file in %DRIVEROOT%/usr/standalone/i386/boot1h) You will also notice a boot0, boot1x, boot1hp, etc., for more information, read below, The other boot files.
-
Put the boot1h file on an accessible drive whether it be the OS X installer disk or another bootable Mac partition, or if you have a real Mac and can plug in your un-bootable drive to it, doesn’t really matter, installation disk is easiest so I’ll continue with that.
- Boot the installer, click next and then click Utilities and open Terminal.
-
run “diskutil list”, find the disk identifier for your un-bootable partition (in my case it’s /dev/disk0s2 and will continue with it), then run:
-
sudo dd if=/whereever/you/put/this/file/boot1h of=/dev/disk0s2
- If you get Resource Busy, this failed so open Disk Utility and unmount the broken-boot drive (this is why you can’t have the boot1h file on that drive)
- run command 6 again, it should complete successfully and show the bytes written, if it did not, please contact me with the error.
- This only writes the bootloader properly, we now need to flag the drive, run:
- sudo fdisk440 -e /dev/rdisk0 (referring to my disk again, yours might be different) then run these 1-letter commands:
- p (list partitions)
- f 2 (this will flag the 2nd partition, e.g. disk0s2 from above but you might have a different partition number)
- w (write)
- y (…yes)
- exit
- This should have properly written and flagged the bootloader, please read below especially about the Metro bootloader and let me know if this did not bring you success.
The other boot files:
boot0md – Used when 2 or more disk with Windows on the other disk than OS X
boot0 – One disk with OS X and Windows, or only OS X.
boot0hfs – One disk with OS X and Windows or just OS X.
boot1h – possibly alternate bootloader or backup?
boot1hp – ?
boot1x – ?
etc.
Other Notes:
Bypass ‘Connection is unsafe’
Websites are marked unsafe when they don’t have a certificate to verify there authenticity:
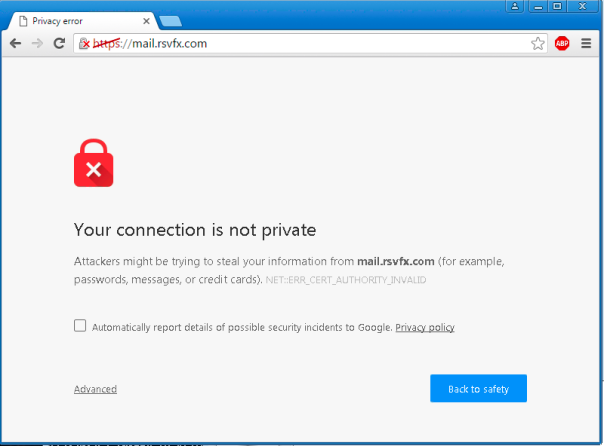
To access URLs that have unsafe certificates that you are sure you can trust, simply click Advanced:
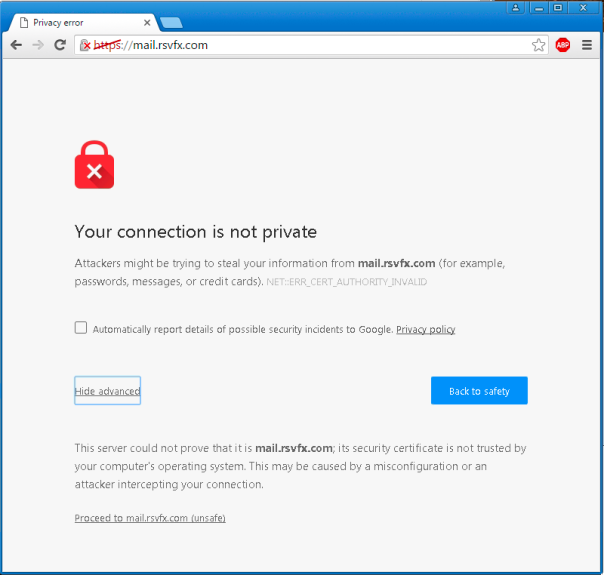
Then click “Proceed to URL (unsafe)”

Windows 10 ‘Something Happened’ Fix
If you are one of the millions that are getting the 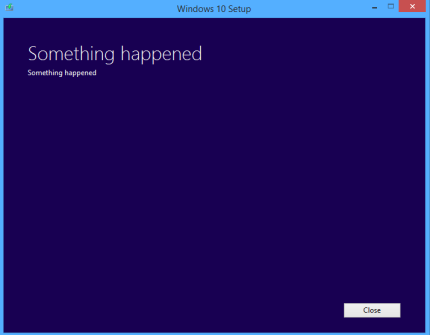 Something Happened error, it’s likely you are running an unofficial version of Windows 7 and the Windows Activation Technology has been tampered with causing the error.
Firstly if you haven’t tried the following suggestion of changing your language settings, this may be the case for you if you haven’t stumbled upon this fix already.
Next we want to remove modifications done by the infamous RemoveWAT.EXE, run this software to revert your WAT modifications (Mirror) and after rebooting, you should see a new update that was previously blocked by the malicious software, after updating Windows, you should be able to start installing 10
Auto login Windows 8.1 Domain account
Have you recently signed into Windows 8 with a Microsoft account? Is the check box missing on your netplwiz to allow auto-login:

If you try setting auto login from the registry, The ‘AutoAdminLogon’ key always reverts back to 0 and resume from sleep will not work.
 Thankfully this is a simple fix, open up Control Panel, User accounts and click “Reset Security Policies” on the left, afterwards run ‘control userpasswords2’ or ‘netplwiz’ and you will see the check-box to automatically login is back.
Can’t RDP over WiFi on Windows 8/8.1 over 802.1n
Another quick Microsoft fix
Have you tried:
1. Deleting the wireless profile and reconnecting to the network?
2. Connecting to RDP over LAN and then connecting to WiFi while on the RDP session over LAN?
3. Saving credentials according to this guide?
Solution:
1. Goto PC Settings/Network/Connections
2. Click the Wireless network you are connected to
3. Change the “Find devices and content” option from Off to On
4. Try connecting to RDP now.
Microsoft used to ask you whether or not you wanted to trust a network over 802.1n wireless connections but due to a recent update, it just assumes all 802.1n networks are business networks and will automatically set the network to untrusted.
OneDrive constantly crashing and restarting on Windows 8.1 Fix
Just saw a ton of Google searches on this, if it doesn’t help but your having the same problem, send me some screenshots…
This may be a mapping issue on Microsoft’s part, if you upgraded to Windows 8.1 from Windows 8 and had symbolic links mapping the SkyDrive folders, it’s likely that Windows didn’t properly move the folder from ‘SkyDrive’ to ‘OneDrive’
Procedure:
1. Right-click and check the Properties of OneDrive from C:/Users/%youruser%.
2. Click the Location tab.
3. Does the location say “C:\Users\%youruser%\SkyDrive” even though the folder name is OneDrive?
4. If it says SkyDrive, change it OneDrive.
5. Reboot
Playing MOBAs with a WiiMote Controller on Windows/Mac
I’ve been meaning to post this for a while not to say it’s anything new but for all MOBA players – Diablo, League, HOTS, etc. have probably found it pretty tedious to constantly be slamming 5-10 buttons on your keyboard and if you own a laptop, that palm is probably sweating twice as much because of it.
So let’s start off by stating the obvious:
The WiiMote is used for input, NOT motion control!
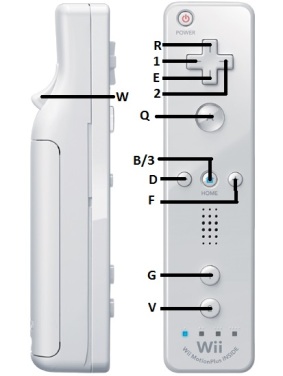
Preferred Controls
Right-hand = Mouse & Left-hand = WiiMote
You can see my preferred controls on the right, although I use 1 and 2 as short-hold to ping and long-hold to taunt, it’s recommended to just emulate keys as regular keys, complex actions will cause issues with the response time of the key which will destroy your game (hence why I use the keys less critical).
No I do not use the applications to combo for me, although you probably could make a ton of profiles and set their combo accordingly, that would require a ton of fine-tuning and is just cheap and pointless towards a game, don’t waste your time and effort.
Windows
Siimple – Siimple requires you to script the controller, very simple process especially if you use my template (make sure you remove the .key). this is a free solution and thus can be troublesome, if not with OS issues, then with game recognition.
My scripts
Pinnacle Gaming Profiler – This is what I use and for many, many games that lack controller support, PGP is the best bet in terms of emulation, PGP never fails. It’s a paid application but this is what I use since I had trouble with Siimple.
My pins
Connecting the WiiMote to Windows: Use Dolphin Wii Emulator to initiate your connection with the controller, then launch Siimple or PGP, this is the fastest solution IMO.
Mac
For the few Mac Gamers interested in this, check out DarwiinRemote
My config
Migrate Plex Media Server Appdata to FreeNAS and don’t delete the metadata with each update
If you use PMS on Windows/Linux/Mac and want to migrate to FreeNAS’ Plugin of PMS but don’t want to delete your metadata to keep your view history and on deck, here’s a pretty simple tutorial:
Open the FreeNAS shell and:
mkdir /mnt/RAIDname/Plex
Copy the “Plex Media Server” application data folder from your previous server to the location you just created.
Now add the storage mount to the Plex plugin jail at /media/Plex from the FreeNAS GUI and open the plexmediaserver_jail shell and:
cd /usr/pbi/plexmediaserver-amd64/plexdata
rm -R “Plex Media Server”
ln -s /media/Plex/”Plex Media Server” .
If you moved your application data and the server isn’t starting correctly, delete the Preferences.xml file and it will bring up the setup tutorial but all your media and deck will be in tact, you can skip the tutorial, you will have to set your preferences again though.
UPDATE: If you want to setup crontab to automatically update your server, please see this forum, mstinaff created a script to update the PMS and describes to me how to setup crontab to run the updater automatically.
Unorthodox Darwin Boot Fix for SSD’s with GUID GPT on a non-EFI BIOS
A fair number of Hackint0sh users have probably become aware of the boot issues with SSD’s especially on Laptops without UEFI support, some users believe this is caused by the 6GB/s ports and using a 3GB/s port will solve the boot-loader issue while others are convinced it’s the brand/size of the SSD while the serious techies seemed to have narrowed it down to 4KB sectors of newer drive models today but unfortunately many of the fixes for these problems require a lot of work in the command line and what’s worse, the boot-loader is susceptible to crashing especially if you plan on adding a new OS to your partition table.
Truthfully no one understands the depth of why the boot-loader consistently fails and my fix should be considered a band-aid until future revisions of the Chimera/Chameleon boot-loader become more stable and more universally compatible. I have been using this fix for over a year now and haven’t run into any problems, if anything, my PC has become more stable since doing this but only because I notice less Kernel Panics and rarely have trouble booting (with the exception of a harmless EBIOS error after a hard reset or chainloading your bootloader if you triple-boot – this error does not harm your drive, it is merely a hiccup when reading my modified partition table). This fix should not take you longer than 5 minutes should your SSD be eligible, let’s begin:
1. Boot into your Mac partition using rBoot or any similar tool, you should be able to boot into your Mac partition or you are looking at the wrong tutorial.
2. Open terminal and run the following command:
fdisk440 -e /dev/rdiskX (X is the drive number for the SSD, typically 0. Run disk utility, select the SSD and click the Info button to determine the # of the drive).
(*newbie note: fdisk440 recognizes Unknown IDs as Darwin, GPT, UFS, etc whereas fdisk w0ill not – assuming the partition ID is real)
3. Now we are about to edit our drives partition table, enter the command P and press enter to display the partition table. If you have both Windows and Mac installed, you should see an HFS and NTFS partition and your output should be similar (not exact) to this:
fdisk440 -e /dev/rdisk7 printout:
Offset: 0 Signature: 0xAA55
Starting Ending
#: id cyl hd sec – cyl hd sec [ start – size]
————————————————————————
1: EE 1023 254 63 – 1023 254 63 [ 1 – 125045423] GPT
2: 00 0 0 0 – 0 0 0 [ 0 – 0] unused
3: 00 0 0 0 – 0 0 0 [ 0 – 0] unused
4: 00 0 0 0 – 0 0 0 [ 0 – 0] unused
4c. If you have an SSD with a table similar to the one above, please leave a comment and I can help you, but I will not include instructions in the tutorial because I have had issues with the boot-loader remembering itself on this type of SSD.
5. Okay here’s the scary part, type the command:
e 1
6. We will now be changing the identifier from EE (GPT) to AB (Darwin Boot 8MB) so type AB and press enter. Terminal will ask if you want to edit in CNS mode, type n and set the offset to 0, the start to 1, and the end to 8. I have tried matching the partition exactly, only changing the ID to AB but that is tedious and from my findings, does not help the drive boot any better. The first 8 MB is all that’s required to boot the drive, if you want you could set the end to 200480 which is the real size of the first partition but again, no point, I suggest using 8MB.
7a. Looking back at the first fdisk output, notice the *2 in green, this represents the flagged partition. My flagged partition is Mac but depending on your version of Windows, your NTFS partition might be flagged and we don’t want to change that just yet, so if you see a * beside your NTFS partition then continue to step 8.
7b. if none of your drives are flagged, enter the command,
f 1
this will flag the darwin boot partition we created, hopefully giving it boot priority.
8. Enter the command w to write the partition table to file. Now press q and install your preferred boot-loader, I use the latest chameleon r2064 currently. Now shutdown and attempt to boot the drive using the F12/F9 key to select it from the BIOS menu. If your Windows boots, go back to step 7b. If Darwin boots, congradulations! Keep reading though, I have some important notes to be aware of.
So WTF just happened? Well we’ve tricked our SSD into thinking it has an MBR and not a GPT… no matter how you installed windows or mac is irrelevant. Time Machine works fine and windows barely notices a thing… the drive is still a GPT and should you need to modify your partitions, simply open Disk Utility, select your SSD (NOT ONE OF ITS PARTITIONS) and select the first aid tab and run the repair disk command. This will restore your original partition table (you can verify this by running fdisk) and after a reboot with an appropriate bootloader, you’ll be able to resize/add/remove partitions again, once you finish, just fdisk back into the drive and patch the partition followed by anther bootloader install.
Does this affect Time Machine, what if I want to wipe my drive? Not right now but future versions of TM might notice the table change so I HIGHLY suggest repairing your disk, rebooting, running TM before you plan on formatting and restoring from a backup. I usually don’t do this but I know how to recover my data should I ever run into the issue but I can’t say the same for you. Backups performed on the “MBR” are no different than the GUID, so running the backup on the GPT shortly after should only take a few seconds and could save you a lot of time than if you just skip this step.
If this method scares you then I would suggest using a tutorial for installing your Mac partition to a properly formatted MBR which is possible but in my experience, this method is very risky and many users have reported time machine issues as well as HDD permanently crashing. Installing to an MBR is complicated stuff and even Mountain Lion hasn’t implemented the option meaning Apple wants you to use GUID and I prefer it myself since damaging them is very difficult, repairing is usually just the click of a button, and there is a ton more functionality/control than Window’s MBR allows. Even though this tutorial spoofs an MBR, It does not behave like one and Windows recognizes this by not allowing partition changes to the spoofed SSD. Linux also gets confused if the Darwin partition is too big and won’t mount the drives which is another reason i only use 8 MB.
Adding an “Existing (Boot Camp) Hard Disk” to VMWare Fusion for Mac

Mac users may have noticed that they can’t add an “Existing Hard Disk” which may be another NTFS Windows partition which makes it difficult if that partition is mapped to User directories, thankfully its a fairly simple procedure to add several partition to your scheme though it’s not really posted anywhere on VMWare’s help.
First thing you do is Add a New Boot Camp…

Create a VMware virtual machine that uses your Boot Camp volume for each one of your partitions (the Disk Size is the only identifier for you to tell them apart).

Once you’ve created your “Boot Camp” partitions, right click anyone of them in VMware and click “Show in Finder”, let’s call the partition you boot with, “Boot Camp” and the seperate drive I will be adding is named after it’s size, right click the drive that is not your boot partition and “Show Package Contents”.

These partitions can be renamed however you like but the easiest way is to start them in VMware Fusion so that it recoginizes that file changes have occured, For simplicity sake, I left the names as Boot Camp and Boot Camp 2, start off by deleting the Boot Camp X.vmx and then copy the remaining files minus vmware.log.

Go back to ~/Library/Application Support/VMware Fusion/Virtual Machines and select your boot partition, right click and show it’s contents, paste your files and then right click the Boot Camp X.vmx file and open it with TextEdit.

Now just duplicate the following 3 lines: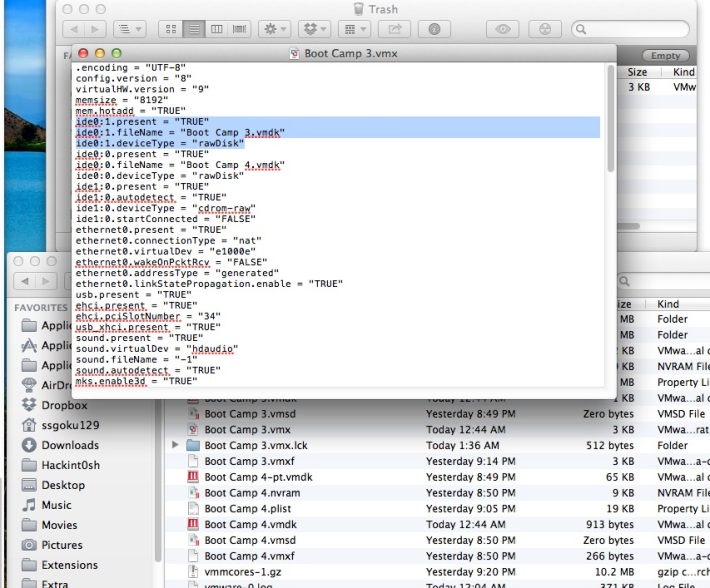
Make sure you change the partition’s location (ide0:x) and not just the fileName representing the other partitions.
When you start the VM, tell VMware you moved it and you should be good to go, if you can’t boot just swap the partition order, as you may have mixed up your boot drive.
Good Luck
